WooCommerce is one of the most popular plugins for WordPress, and we all know why. But it is no secret that owners sometimes have a hard time exporting orders from this plugin.
Sometimes we want the orders to be exported in a way that works well for the company’s other documents. Every business has its way of working with the details and the paperwork. Maybe we need notable exports from the day before based on the item they purchased, or perhaps we want a full-on report from the month early.
That’s why we are going to show you how to export orders from WooCommerce like a professional. With many cool features that you can play around with.
So buckle up, and let’s go.
To export WooCommerce, we will use one straightforward yet powerful plugin by WooCommerce Order Export.
The PRO version of the WooCommerce Order Export plugin that you need comes with many features that will make your life much easier. You will be able to export WooCommerce all the data that you crave, create automated exports that can be delivered to your inbox, reorder columns as you want, and set up multiple automatic reports if you need.
The following is more about the features of the WooCommerce Order Export plugin.
How to Export WooCommerce
Once you open up the dashboard, you will be greeted by a straightforward and easy-to-use dashboard. It has only the things that you need to export WooCommerce! There is no complicated stuff here, and it shouldn’t be their main focus is to give you the exports that you need and go on about your day!
You will see three little tabs by the name of Exports Data, Settings, and Schedule Exports. These big three will be your primary helpers in this process, and we will cover them to the smallest detail.
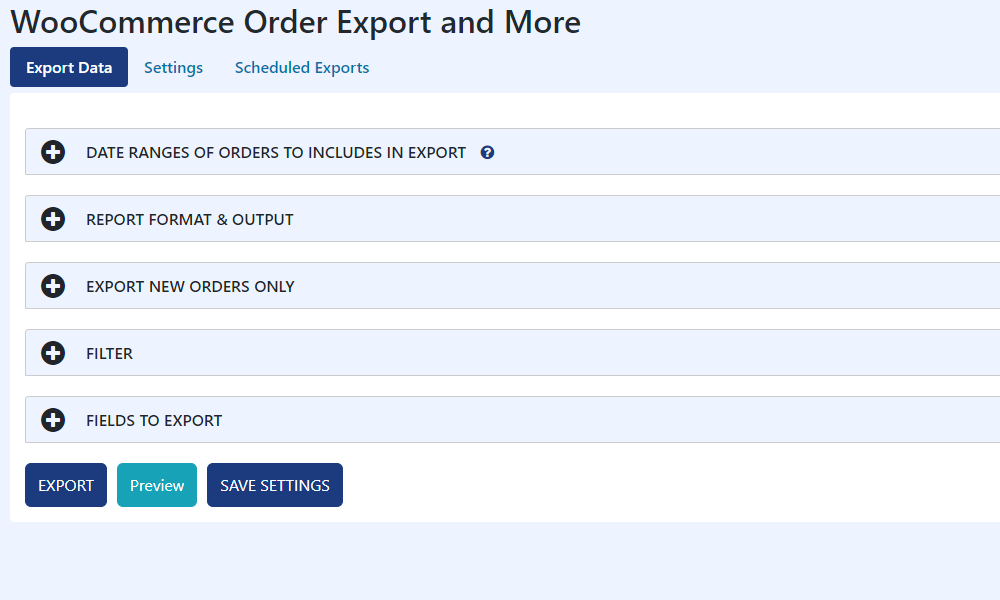
Now, firstly, we will cover up the basics under the Exports tab. Under that tab, you have a few options that we will go through.
Data ranges
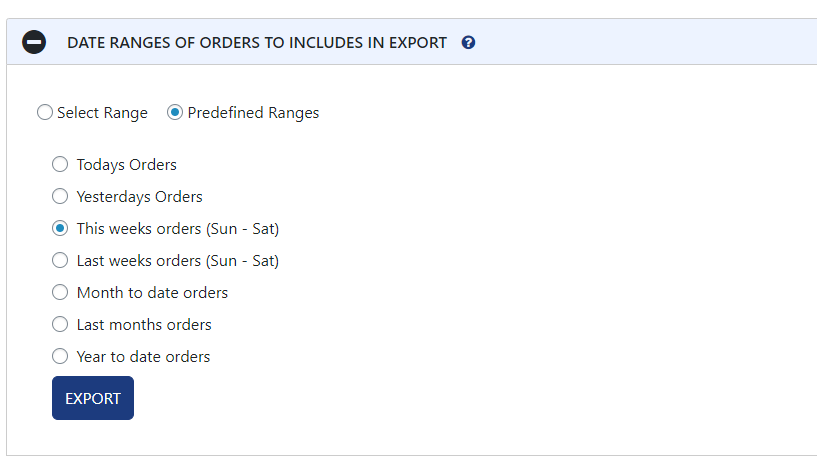
The first one is the Date ranges of orders to include in the export. You can choose which date you want the exports in that section or hit the preferred ranges button.
If you have specific dates that you want to extract, then the first option is your thing, but if you wish to report under that month, year, or week, the preferred ranges are the way to go! There is a lot of selected options that you can choose from, so go through them carefully.
Report format and output

The next thing you get is report format and output. In that particular setting, you get to pick how the data is formed. You can choose the name, date format, time format, in what order, sort by, and more.
It is a convenient option if you need the orders to be formed by a product or a specific name.
Export new orders

The next cool thing is called Export new orders daily. It is beneficial since the plugins remember which orders are already exported to avoid duplicating and exporting only the fresh ones.
Filter
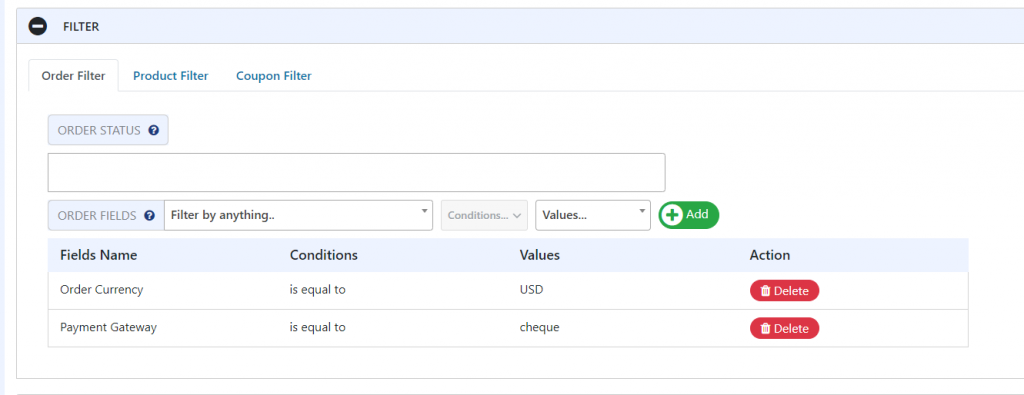
After those, it comes down to Filtering them. You can filter them by order, product, or coupon. And it gives more freedom to filter them by choosing if you wish to filter them by currency, discount, shipping address, and more. And when you decide on which subject you want to filter them, you can be more specific. For instant, when you choose a currency, you can select which one.
Fields to export
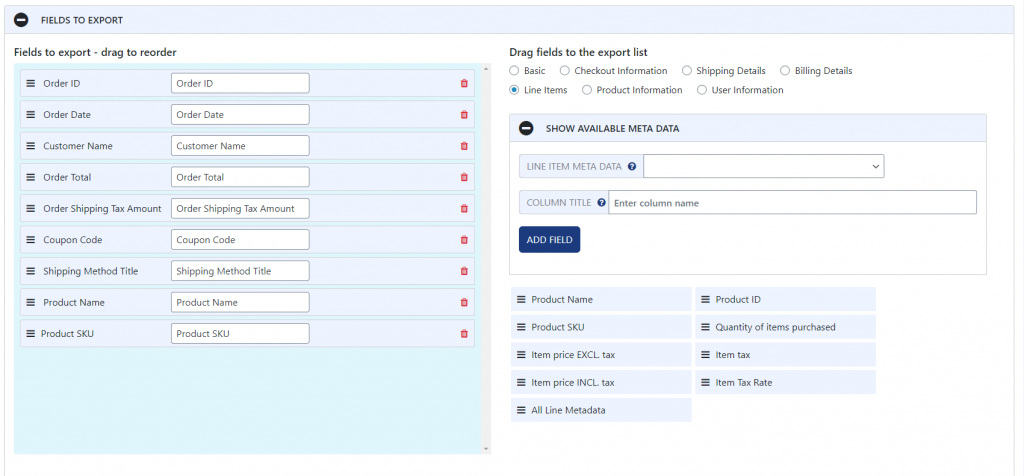
Now, the last part under this tab is by the name of Fields to export. It lets you drag and drop them around which order the fields to export and which one you want to export.
On the left side of the dashboard, you move the fields up and down( the ones that you have already selected). On the right side, you choose which fields you want to drag and drop them on the left side.
Some fields are order ID, product name, shipping state, order date, product name, etc. You get the grip.
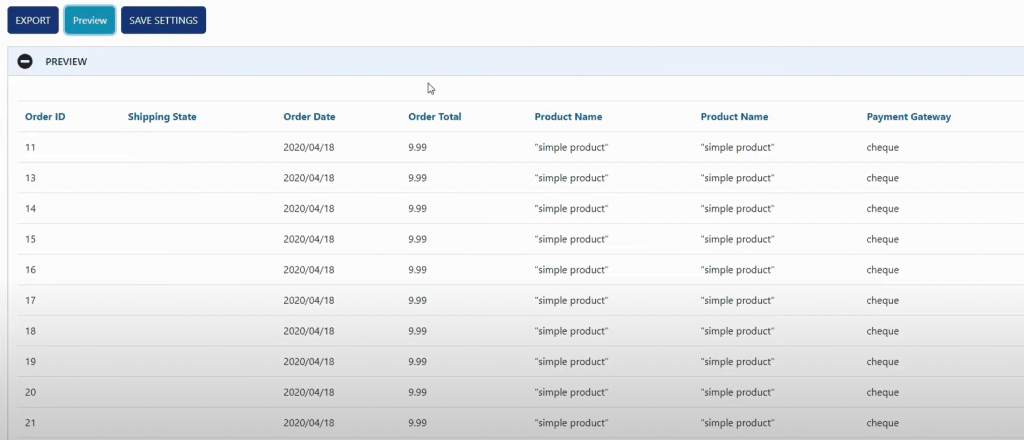
After you have done all that, you have a very cool preview button below that you can click to see how the export will look. It will only show up 25 of them, but the purpose is to know what you are getting, whether you are satisfied or if anything needs to be changed.
And that’s it for that tab, and here you are going if you need a quick export to run under a specific filter.
Settings
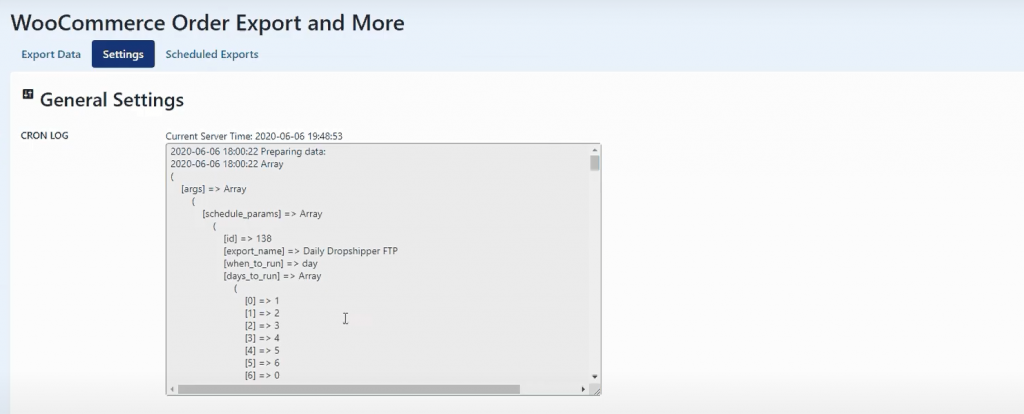
The next tab is called Settings. It doesn’t have much underneath it, but it has a few valuable things.
The Cron Log keeps the log on your schedule exports, and you can see what the input parameters were for that. It is advantageous if your exports aren’t working the way they should, so you can see what is going on in the Cron Log tab. It is like an overview of the things that are happening with the exports, where you can see all the small details.
The two other features are import and export settings. The export setting is something that you can always rely on. If you have problems using this program, you only need to copy the things inside this tab and send them to the guys that are behind this plugin. They will be able to upload them into their system and see what’s wrong. Then when they fix it, you put them into import settings, and voila, everything is back to normal!
Schedule exports

Now, we get to what most people adore about the WooCommerce Order Export plugin – Schedule exports. Instead of running these reports by yourself every day, week, or month, you can give them to this plugin to do it for you! You can have as many schedule reports as you wish. You can have a daily report, monthly, weekly, etc. Besides, you can make more monthly or daily reports but with different agendas on what to focus on. These things are made to make your life much easier.
When you are creating one, the first thing that you will need to do is give it a name. You can name it anything, but it is best to be related to the subject of your report. Then you choose which delivery way you want. You can choose from email, directory, and FTP. When you prefer email, you get to put your email address, the subject of the email, from which email is sent, and which name to put—pretty helpful stuff.
And the most critical part, when you want the plugin to run it, is to choose a specific day, specific date, week, month, or a specific period. Under all those actions, you will see all those things on the first tab, date ranges, export files, and those kinds of stuff.
After you have created your schedule report, you will see it in your dashboard. You will have an overview of the name, delivery details, frequency, last run, next run, and action. Pretty much all are self-explanatory, but in the action field, you can click to duplicate one, edit it or delete it if you want to.
Pricing
The pricing of this little man comes in three different pricing plans.
The first and most popular one is for one site only, and it is a perfect match for any solopreneur. It costs $49 per year, and you get the following features:
- one year of updates and support
- priority support
- cancellation at any time
- and a seven-day money-back guarantee
The second pricing plan is for three sites, and it costs $89 per year. You get all the same features as for the first pricing plan.
And the third pricing plan is for 100 sites licenses, and it is the best option if you have an agency. It costs $169, and it is a one-time payment! If you choose this plan for your agency, then you get the following features
- updates and support forever
- personal manager
- Whitelabel mode
- seven days money-back guarantee
Conclusion
In the end, we must say that having a tool like this is such an advantage. A WooCommerce Order Export plugin that will gladly help you deliver excellent reports that you can pick and choose for what, which product, name, or even address you want it to rank is such a unique experience.
We all know that running a WooCommerce site can be a challenging job and that you pull long hours to make the business run smoothly. So don’t overbear yourself and use any advantage that you can get!


